This blog post will show you how you can start your WordPress blog with HostGator hosting and explain why HostGator is a better choice for any new blogger.
WordPress is the most popular blogging platform, and according to a recent survey over 30% of sites use WordPress. HostGator has been a reliable host and has provided its services since 2002, making it one of the oldest hosting providing platforms.
Brent Oxley founded HostGator, and it is located in Houston, Texas, United States. Its parent organization is Endurance International Group (EIG).
We have been using HostGator services for our WordPress blog for over eight years and can say with confidence that it is a good WordPress hosting provider.
The right blogging platform and hosting provider is the first step towards your online business success.
At the initial stage, you should not spend too much time and money on costly hosting. Select a hosting provider that is affordable, renowned, and works flawlessly. HostGator fits in all these requirements, and it works just fine.
HostGator lets you start your blog within a few minutes, and you can have an online WordPress website in no time.
We have two WordPress blogs with HostGator. For our first blog, we migrated from another host to HostGator. HostGator did everything for free, and the blog was never offline. For the second blog, we were able to launch it within five minutes, and you can do so as well, even if you don’t have any blogging or hosting experience.
Let us get started.
Starting a WordPress Blog with HostGator Hosting
To start a blog, you will have to through the following steps:
- Select the Right Blogging Platform and Host Provider
- Buy Domain Name and HostGator Web Hosting
- Installing WordPress Blog on HostGator Hosting
- Installing Themes and Essential Plugins
- Writing and Publishing Your First Blog Post
- A Few Tips to Grow your Blog
#1: Select the Right Blogging Platform and Host Provider
WordPress is the most popular content management system and powers over one-third of sites on the web. This is a developer and designer-friendly platform, and that is why both communities like it.
The following are few reasons for the popularity of this blogging platform:
- WordPress is a free and open-source blogging platform.
- You can install it virtually with any hosting providers.
- The majority of developers and designers support it.
- It’s easy to manage and maintain.
- Hundreds and thousands of plugins and themes are available.
Why Do I Recommend HostGator as a WordPress Hosting Provider?
We have been blogging for over ten years and have used a few hosting providers. We selected our first hosting provider because its price was the lowest. It was okay and had good email support. Everything was fine until our blog traffic crossed a thousand visitors per day.
The site started slowing down, and many times we could not log in to the admin dashboard. If we could log in to the admin dashboard, every click was time-consuming.
We contacted support and could not solve the issue, so we finally migrated our blog to HostGator shared hosting.
And since then, we have been using HostGator. Even when our blog was getting over 8,000 visitors, we have never found our blog to be slow.
Qualities to look for Good Hosting Provider
You should look for the following qualities while selecting a hosting provider for your WordPress blog:
- The hosting provider must be renowned and reliable.
- WordPress setup should be easy.
- It should offer a fast loading speed.
- It should offer fast 24/7 support.
- The price should be affordable.
- It should offer a money-back guarantee.
HostGator has all these features. You can chat with them almost instantly about any technical issue.
A Few Features of HostGator Hosting
HostGator is a renowned hosting provider, and you can start your WordPress blog with 2.75 USD per month. HostGator offers a 99.9% uptime guarantee, a free SSL certificate, and a free domain for a year.
A few features of HostGator hosting are:
- Unlimited storage
- Unmetered bandwidth
- Free domain for one year
- Free SSL certificate
- One-Click WordPress Install
- 45 days money-back guarantee
- Free email with unlimited space
Why You Should Not Go For Free Hosting Services
These days many sites offer to launch your blog for free, and you might be tempted to start your blog with the free website hosting services. Some of these free website hosting sites are WordPress.com or blogger.com.
These sites are good for an amateur blogger. If you are serious about blogging and interested in making money through your blog, you should not even think about it.
Free platforms are not professional, don’t offer full control, and you cannot use ads. However, they will insert their ads and earn from your effort. Moreover, they will lock your account and can delete your content for any reason they see fit.
I believe you can happily afford a 2.75 USD/month investment to have a long-term business. You will have full control over your blog and content and can insert ads.
If you are a freelancer and have a free blog, making money will be difficult. Advertisers and clients will not consider you as a professional.
You must have a professional-looking self-hosted site for your business. This will increase the trust of your clients in your services.
#2: Buy Domain Name and HostGator Web Hosting
The domain name and web hosting are different. You can buy both services from a single provider or two different ones; the choice is yours.
If you are a new blogger, I would recommend you buy both services from the same service provider to make the process easier.
Now, I will guide you through each step from launching a blog to publishing your first post.
Head to the HostGator site, click on “Hosting”, and then “Shared Hosting”.
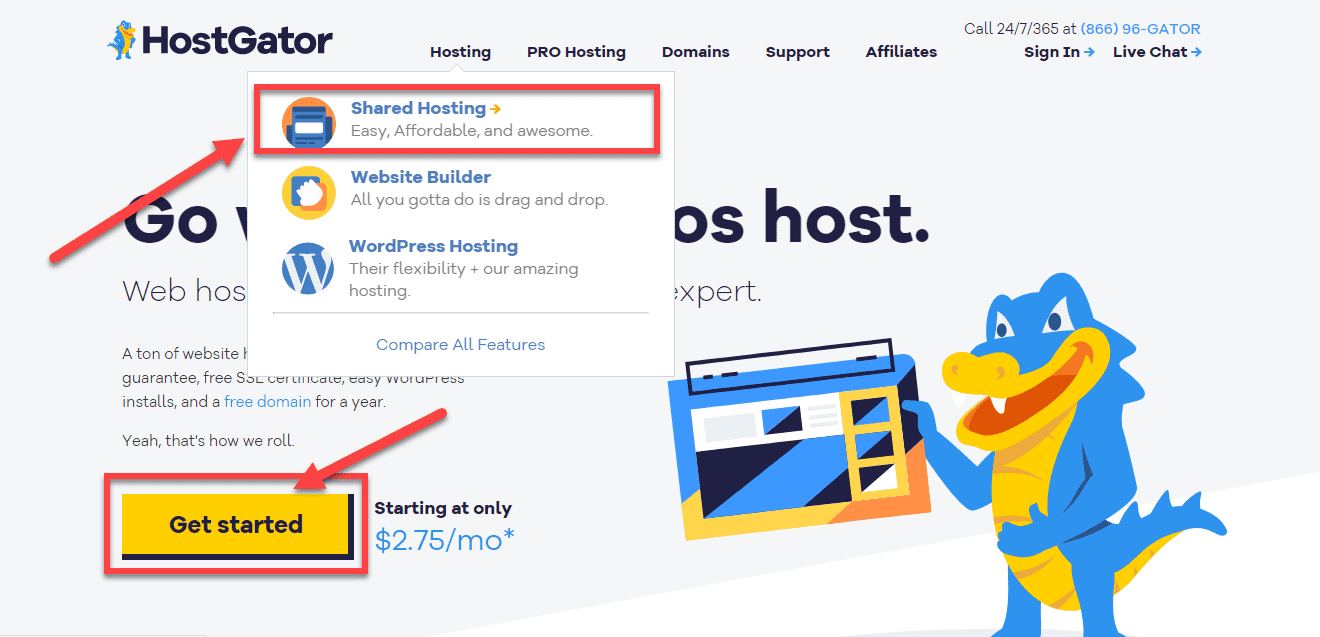
You can also click on the “Get Started” button. You will be seeing the “WordPress Hosting” option, do not click here. This is managed WordPress hosting from HostGator, and it will cost you more. Since you are just starting, shared hosting will be enough for you.
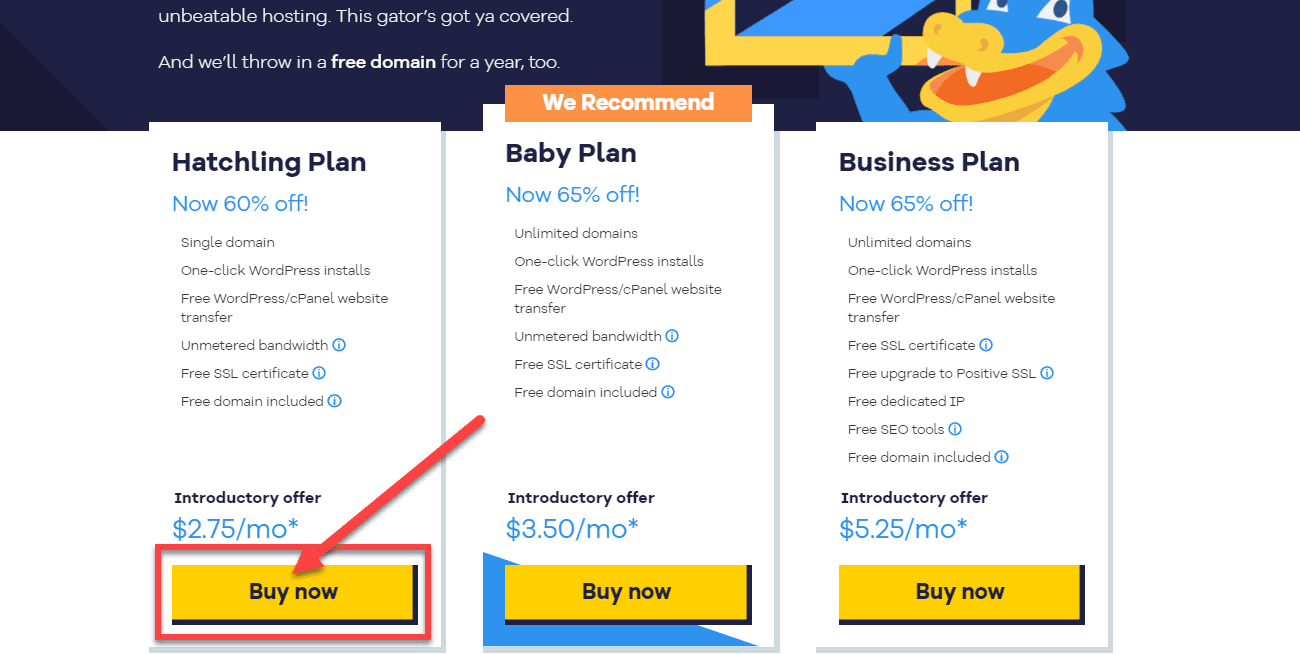
If you are just starting and this is your first blog, I recommend selecting the Hatchling Plan. It is the cheapest plan to begin with.

If you have a domain, you can enter it here or click on “I already own a domain.”
I assume that you don’t have a domain yet. Type your desired domain name and check the availability. I recommend you opt for the “.com” domain as it is more recognized and memorable.
If the domain is available, you can proceed with filling in your billing information. HostGator will try to sell you additional services; I suggest you ignore them for now.
Complete the transaction.
To receive the lowest price to start a blog, select the plan with the longest duration; I recommend you go for at least a three-year package to get the 2.75 USD per month price.
In summary, follow the following steps to launch your blog:
- Go to hostgator.com and click on the “Get Started” button.
- Select your plan.
- If you are purchasing a domain, search here; otherwise, click “I already own a domain” and enter the domain.
- Enter your personal and payment information.
- Select the other services if required
Connecting Your Domain to HostGator Hosting
Skip this step if you have purchased a domain and are hosting both from HostGator.
Login to your HostGator account, and you will find your web hosting address. There will be one IP address like 123.123.123 and hosting addresses like xy1.hostgator.com and xy2.hostgator.com.
If you cannot find these details, contact support and they will let you know.
Now, go to the domain name provider and enter these two URLs for the domain name server. Sometimes they may ask you to enter the IP address. Enter these details, and you are done.
Some experts recommend buying a domain and hosting from different providers for safety and ease of changing the hosting provider. Since you are just beginning, I advise buying a domain and hosting from HostGator to avoid the technical hassle.
Now your hosting is ready.
#3: Installing WordPress Blog on HostGator Hosting
HostGator will email you the login URL, ID, and password.
Click on this login URL:
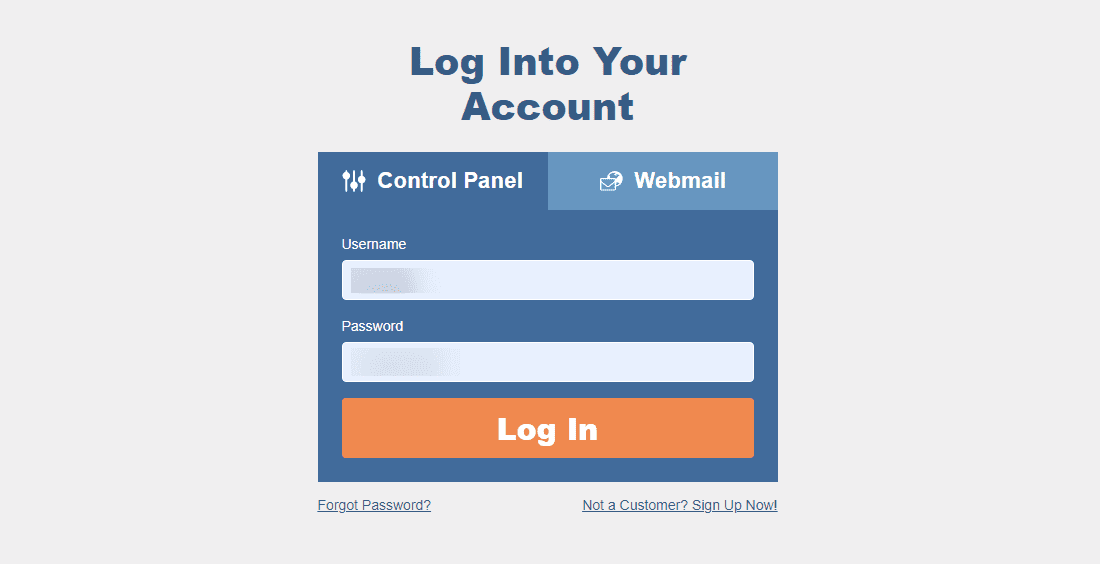
Enter your username and password.
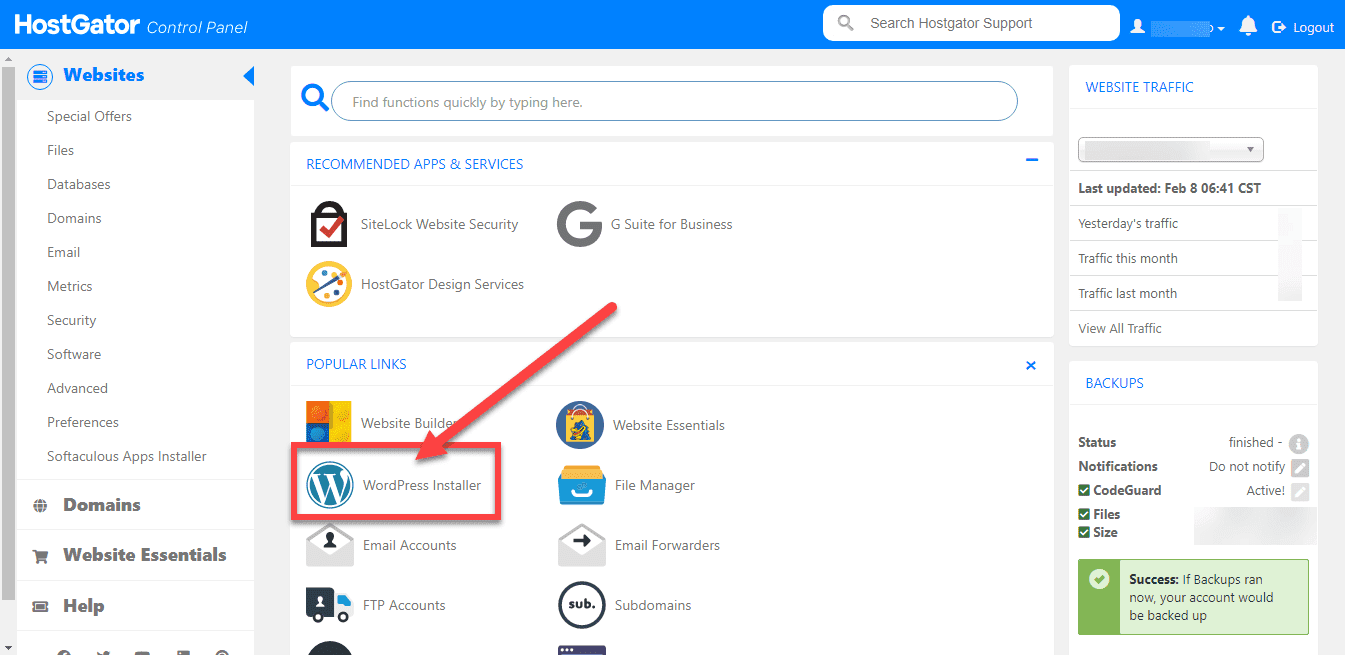
You can see your control panel now.Click on “WordPress Installer.”
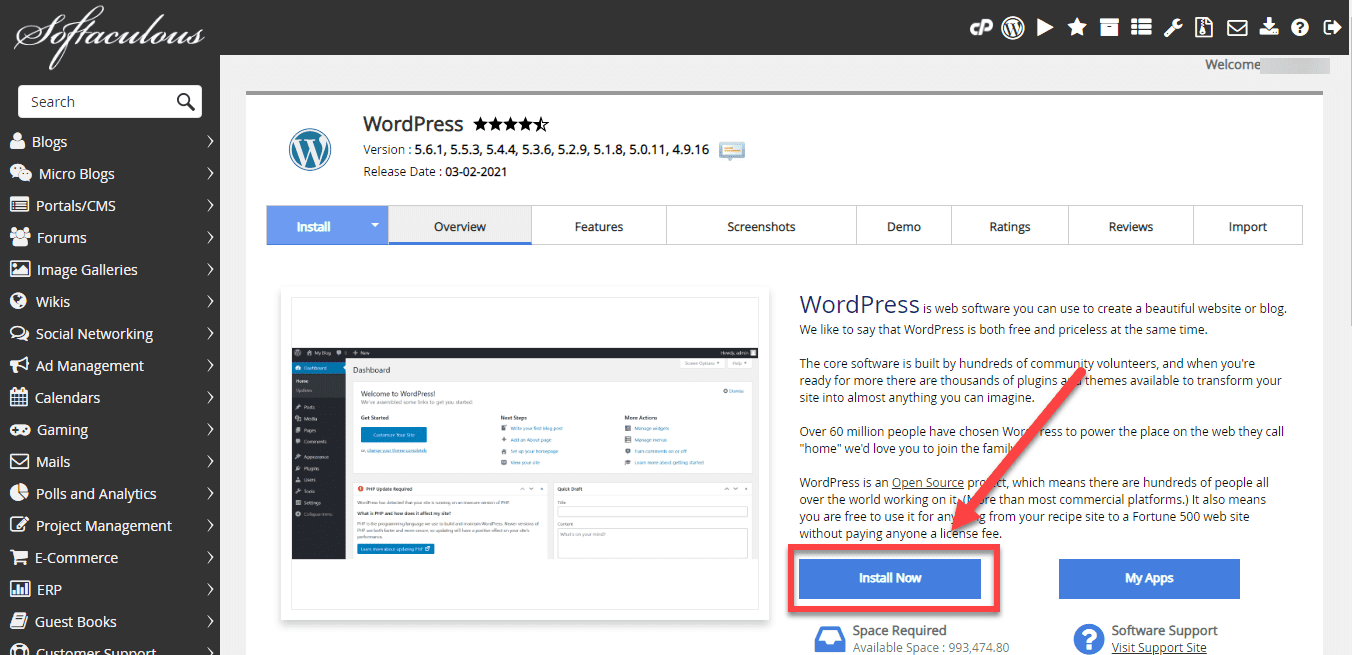
This will take you to “Softaculous”, a WordPress installer. Click on the “Install Now” button.
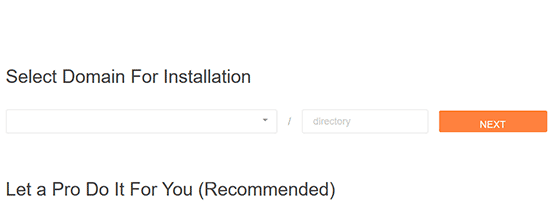
Now select your domain.
If you want to install your blog on a sub-directory, you can mention it here; otherwise, leave it blank.
Click on Next after selecting the domain.
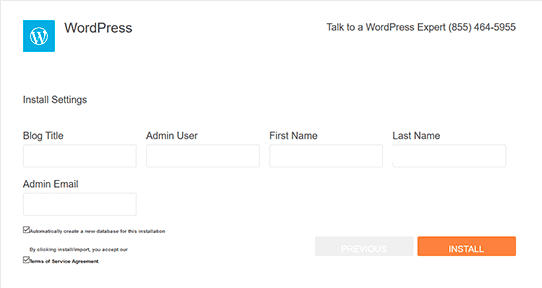
You have to enter your Blog Title, Admin username, First Name and Last Name, and Admin Email in the next step.
Fill in all these details and click on “Install”.

Note down your username and password.
Congratulations!
Your WordPress blog is ready, and you can log in to your admin dashboard.
If your site URL is https://mysite.com then your Admin login will be https://mysite.com/wp-adminYour Admin Dashboard will look like this:

Get your hosting today!
They are affordable, and they have a beginner-friendly interface and an easy blog setup process.
#4: Installing Themes and Essential Plugins
It is best if you go for any premium theme from day one. However, if you are short on budget, I recommend you go for the GeneratePress free theme. This is a lightweight and reliable theme.
I am using Thrive Theme Builder for this blog, and I believe this is the best theme for WordPress.
This is a premium theme and includes a page builder and other conversion-focused plugins. You can design the site you dream of with no coding.
Everything can be designed using a graphical user interface.
I recommend you use Thrive Theme Builder to design your blog.
Things to Consider While Developing Your Site
You should have a few things ready before you start designing your blog.
Logo: A logo is a crucial brand element. Design a good logo or hire professional help to get it done. You can go to Fiverr and get a beautiful logo for 5.00 USD. A logo can have text or text with an icon. Go for what you like.
Color Scheme: I like the color orange for my blog, so I designed my blog around it. Choose your color scheme as per your taste and stick with it.
Content: Your important pages should have content such as About Us, Contact, and Support. Also, make sure you have at least ten blog posts ready when you start your blog.
Social Media Accounts: Create a Facebook page, Twitter profile, or any other social media account you are comfortable with and popular in your niche.
Now you have to install a few essential plugins.
Below are my recommended plugins that I urge you to install on your blog to get an immediate benefit.
Akismet Anti-Spam
Akismet is an anti-spam plugin that keeps spammers away from your blog. Ensure you have this plugin installed on your blog from day one. This is a free plugin, but you need a wordpress.com account to activate it.
Google Site Kit
You need to know what kind of visitors visit your site, their location, and most and least visited pages. You can find this information with Google Analytics. Google Analytics is the most popular plugin to know your blog analytics.
This is free and provided by Google. I recommend you install Google Site Kit to activate Google Analytics on your WordPress Blog.
Other methods are not too reliable and can break if you update your plugin or change the theme.
WP-Optimize
WP-Optimize is my favorite plugin. This plugin serves two purposes. First, it helps your blog load faster by keeping a cached copy of your blog and serves users more quickly.
This plugin helps in cleaning databases as well. Once in a while, you can run it to clean your database and remove unnecessary files and keep your WordPress install light and clean.
Simple Social Icon
Social sharing icons make it easy for your visitors to share your posts on their favorite social networks. Simple Social Sharing is a lightweight plugin that will serve this purpose.
If you are using Thrive Theme Builder, you don’t have to use this plugin. Thrive Theme has an inbuilt social sharing icon.
YOAST SEO
This is another must-have plugin. This plugin makes sure that your blog posts are SEO optimized and readable.
This plugin helps you achieve both objectives. YOAST SEO is available in both the free and premium versions; I suggest you go for the premium version to optimize from day one fully.
#5: Writing and Publishing Your First Blog Post
To publish your first blog post, log in to your WordPress admin dashboard.
You can access your WordPress Admin by typing your domain name into your web browser and adding “/wp-admin” to it.
So, if your domain is “myblog.com,” type https://myblog.com/wp-admin and enter your admin ID and password.
Once you have logged in, you will see the WordPress Dashboard or “admin area” as shown in the image below.
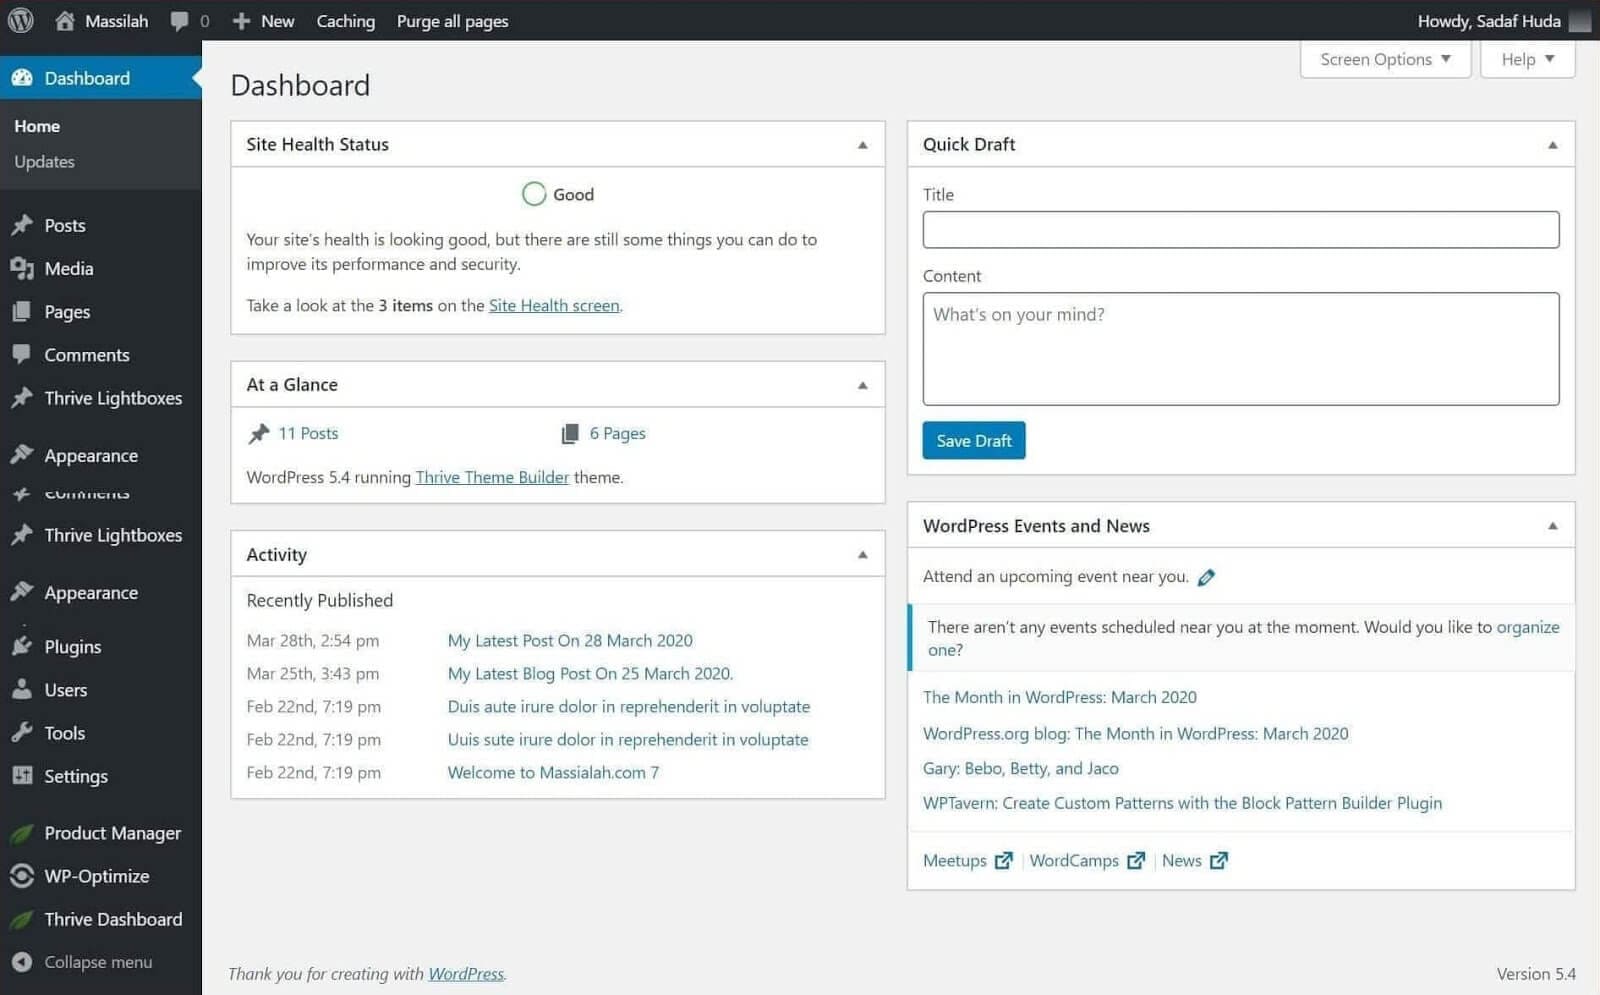
This dashboard is visible to you, and only you can access it.
You can see many options here:
- Posts: You can write a new post or edit published posts.
- Media: You can upload media here, for example, images, videos, PPS, etc.
- Pages: Here, you can create pages for your site, for example: About, Contact, Resources, etc.
- Comments: Here, you can moderate comments.
- Appearance: You can install and configure themes here.
- Plugins: Here, you can install plugins from WordPress repositories or upload them.
Now, let’s publish your first blog post.
You have two methods to publish a blog post.
Navigate to Posts > Add New:
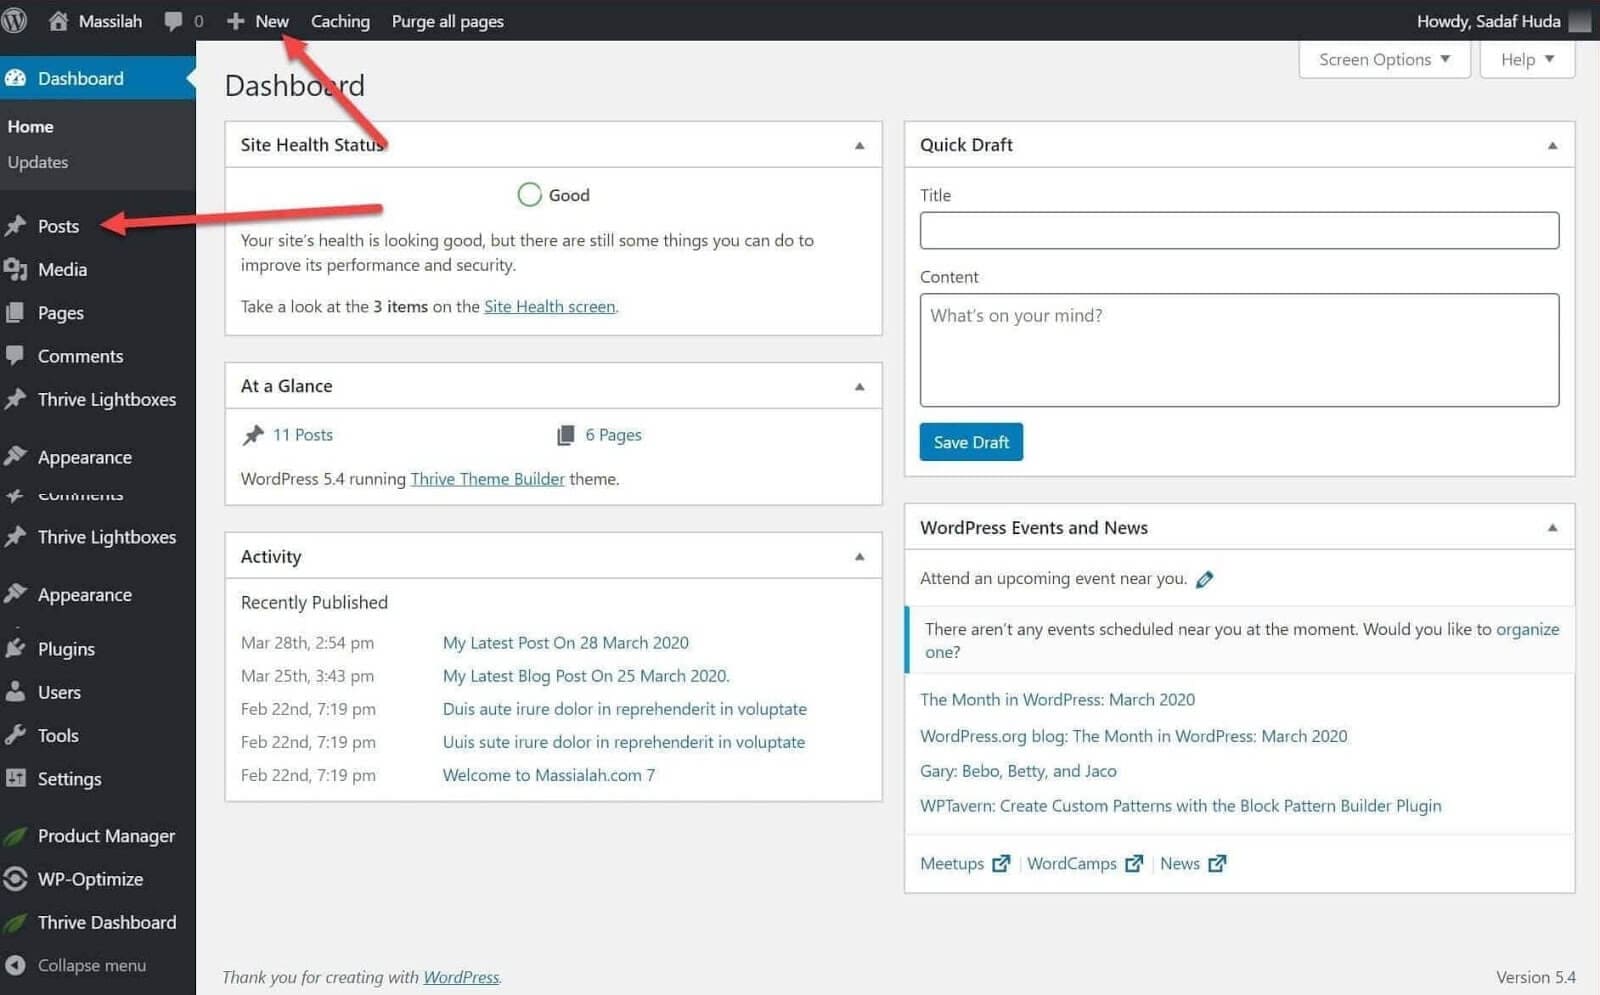
You can also click on “New” at the top bar and then click on “Post.”
This will open the post editor.
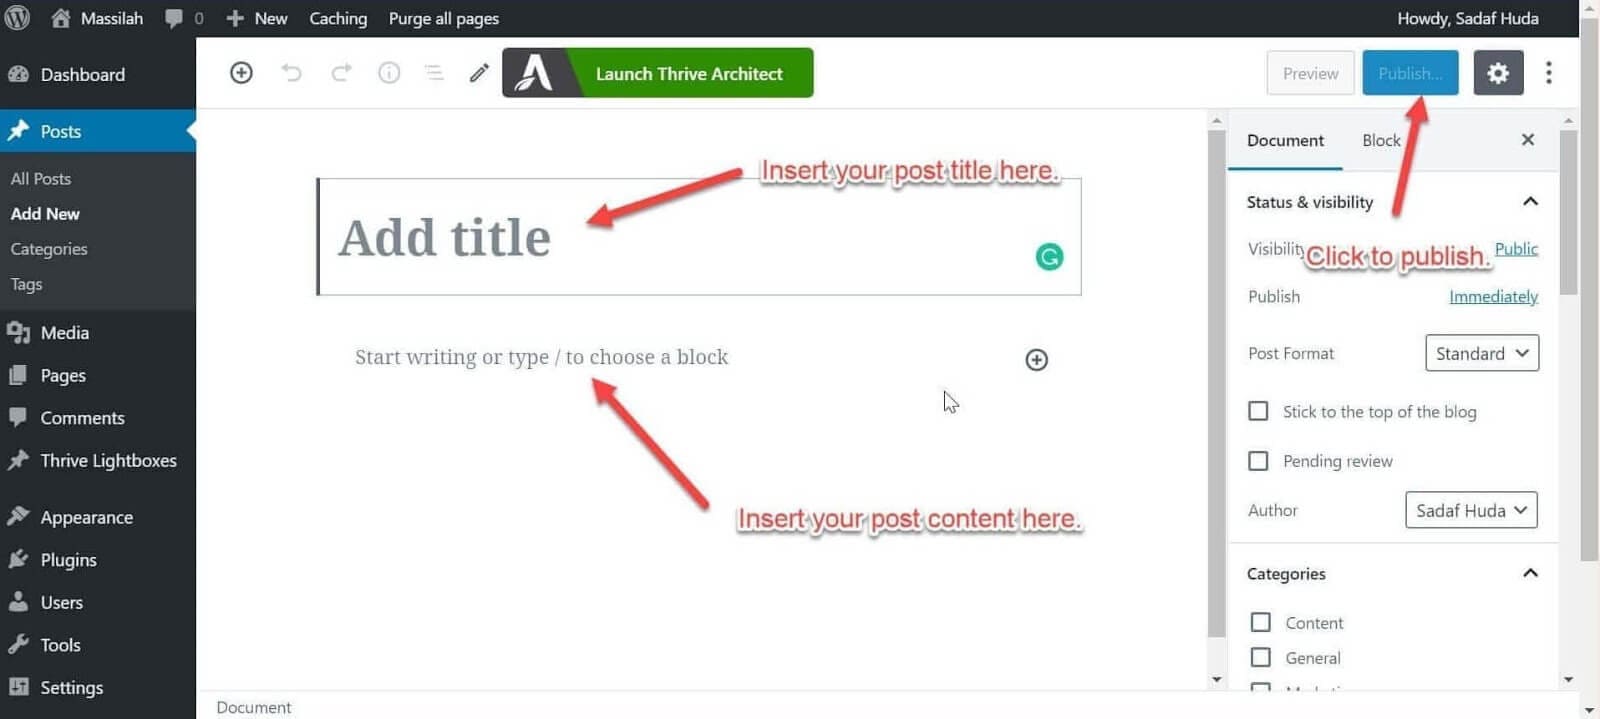
Now you can type a post title and then add the content.
If you want to publish your post now, click on “Publish”, and your post will be live.
Congratulations on publishing your first post!
#6: A Few Tips to Grow your Blog
Below are a few recommendations that will help you grow your blog.
Investing in Your Blog
I did not spend any money on my blog except for hosting initially, and I regret it. It cost me time and headaches. I only spent money when I had no choice. This was a poor strategy that hindered my blog growth.
You should not do the same and invest money in your business. Buy a good theme, plugins, and tools to grow your blog. Focus on your core business and outsource the rest.
Build an Email List
Start collecting emails from day one. If you don’t have any lead magnet such as an eBook to offer, just keep a simple form and ask the subscriber to subscribe to your blog and get the latest updates.
If your content is good, your visitors will subscribe to your newsletter.
After developing the lead magnet, you can update your signup forms.
I recommend using the MailerLite email marketing service to build your email list and send emails to your subscribers.
MailerLite is an affordable email service provider, and I am using it on my blog.
Limit Time on Social Media
Avoid spending too much time on social media. It is an addiction; use it to expand your reach and focus on growing your blog.
Over the past ten years, I have seen many social media algorithm changes. They update their system to suit their requirements, and bloggers; marketers suffer in the end.
In the early days, we used to get a lot of engagement for our posts on social media, but now the organic reach is too little, and we have to pay them to get better visibility.
Anyway, at this stage, you should focus more on creating content, collecting emails, and networking with other bloggers in your niche.
Build Network with Bloggers
You should communicate and build your network with other bloggers in the same niche.
Share their posts, comment on their blogs, and let them know how they helped you start your blog. They will return the favor by sharing your post on their social media or allowing you to publish guest posts on their blogs.
Guest posts will get you a backlink, and this is crucial for blog growth.
Create Quality Content
Spend time and create quality content. This is key to the growth of your blog and helps you get loyal visitors and clients. Instead of posting mediocre articles, publish a few in-depth long-form guides that provide value to your visitors.
Visitors like comprehensive and unique posts and search engines love them. Many bloggers fail here. Don’t be one of them; write an in-depth guide at least once a month.
Add images, videos, infographics, data, etc., to your post to increase the interactivity.
Make sure your posts are error-free. Use grammar checker software such as Grammarly, or ProWritingAid and get help from proofreaders to edit your posts.
Keep Watching the Trends
Visit top blogs in your niche and see what they are writing about. Understand their techniques and follow them on your blog.
Keep yourself updated with the latest trends and advancements in your niche.
Write a Guest Post on Other Blogs
I did not do this well, but I understand its importance.
I recommend you network bloggers in your niche and try to publish as many guest posts as you can. It will get you a backlink and an expanded audience.
Communicate with Your Audience
Don’t just use mailing lists to send notifications of your recent posts, affiliate products, and product updates; once in a while, communicate with your audience.
Ask them how you can help them and what you should write and how to make their experience better.
Conclusion
HostGator is a great web hosting provider, and you can safely host your WordPress blog with them. Their pricing is affordable, and support is instant.
Millions of webmasters are using HostGator to host their sites, and I am one of them. I have never regretted working with them, and I hope you will enjoy it too. I hope now you can easily start your WordPress blog with HostGator Hosting.
If you have done so, please share your experience through the comments section.